Windows OS has many awesome inbuilt features, and surely we don’t know all of them, for ex: ‘Windows Task Scheduler‘. Task Scheduler provides the facility to launch any program or script at the pre-specified time or after a specified time period/interval. It may help you to create a custom defined task and to execute them as per your requirement.
Also Read:
- How To Remove Personal Information From Files : Windows 10
- How To Find WiFi Password On Windows 10/8/7 [All Saved Network]
- 2 Simple Way to Change/Spoof MAC Address In Windows 10/8/7
There are many Free Windows Scheduling Softwares available that will optimize your task scheduling process with some additional functions, Read Here. In this article, we gonna show you how you can view already activated tasks and create new tasks to automate your work. Let’s get started.
How to Create Task with ‘Windows Task Scheduler’
You can use Task Scheduler to create and manage common tasks that your computer will carry out automatically at the times you specify.
For example: If you want to Shutdown your computer ‘at a certain time’ or after a specific task/time periods, this Windows Task Scheduler will gonna work for you.
To create a Custom task, just follow the step by step guide explained below.
Step 1: Go to Start–> search for ‘Task Scheduler‘. This is available in all versions of Windows (10, 8/8.1, 7, Vista, XP), so whatever version you have, just search it.
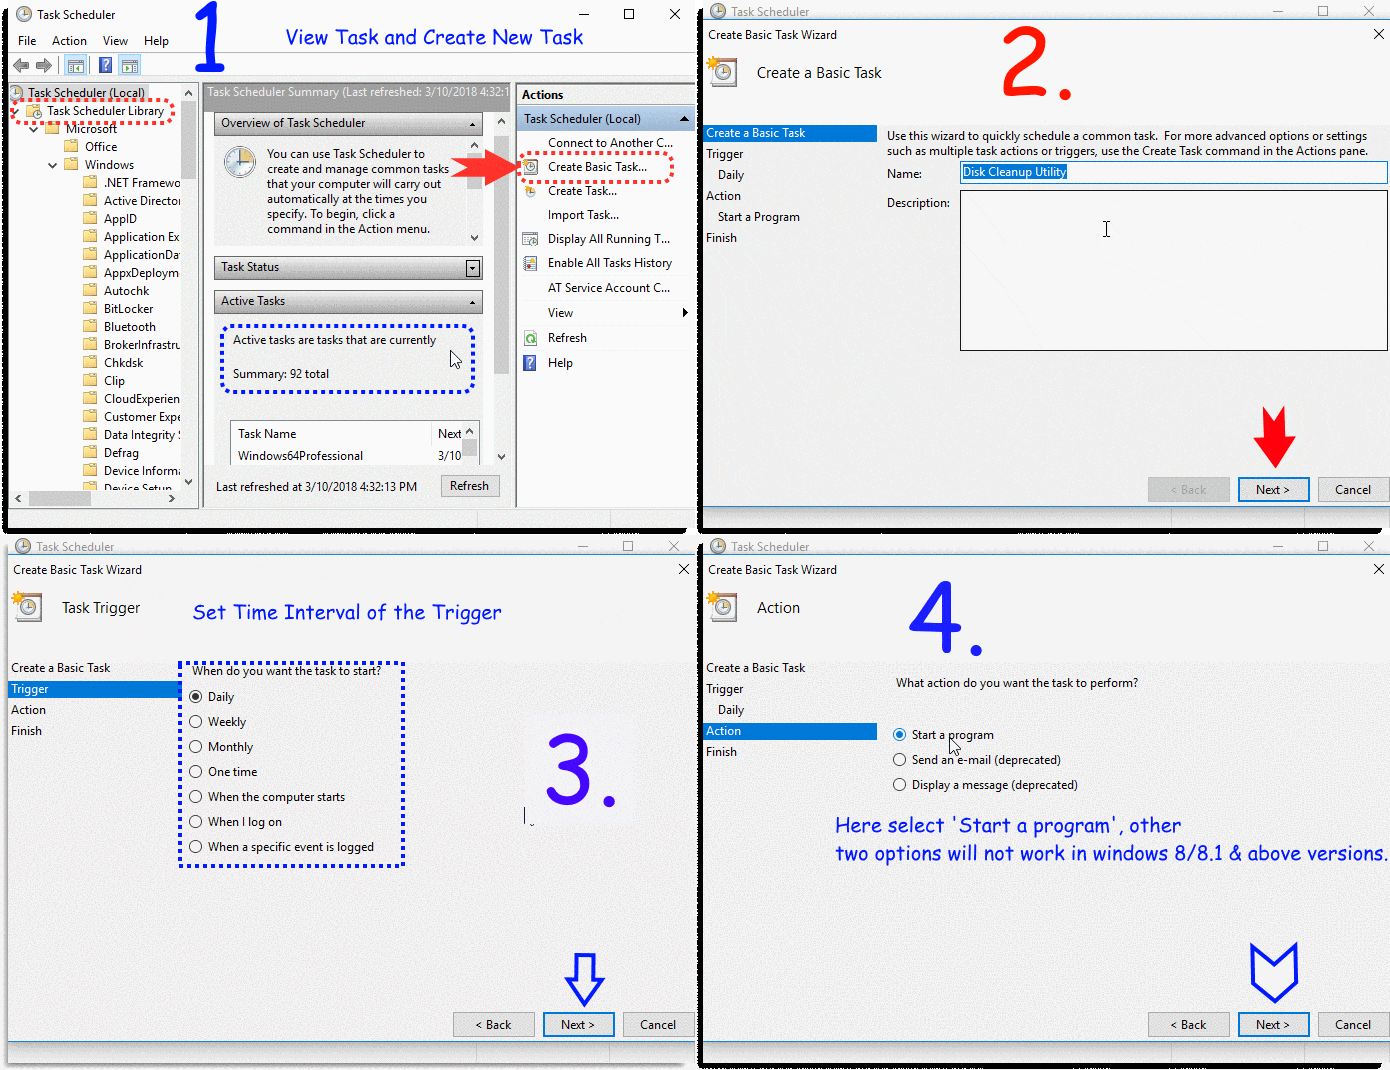
Step 2: Task Scheduler window will get opened. This window is divided into ‘3 column’.
- 1st column work as ‘Index’ for Task Library,
- In 2nd column, you can view ‘Task Status’ and all the ‘Active Tasks’,
- 3rd column is of ‘Actions’, wherein you can Create a new task, Import Task and many other actions as shown in the image given below:
So, here to create a New Basic Task, Refer to Column no. 3 and click on ‘Create Basic Task‘.
Step 3: From next window onward, you have to enter details to set up your task. So Start from ‘Naming’, Just give a name and description to your task, click on ‘Next’.
Step 4: In next window, set the Trigger time interval for this task. You can select from the given option: Daily, Weekly, Monthly etc.
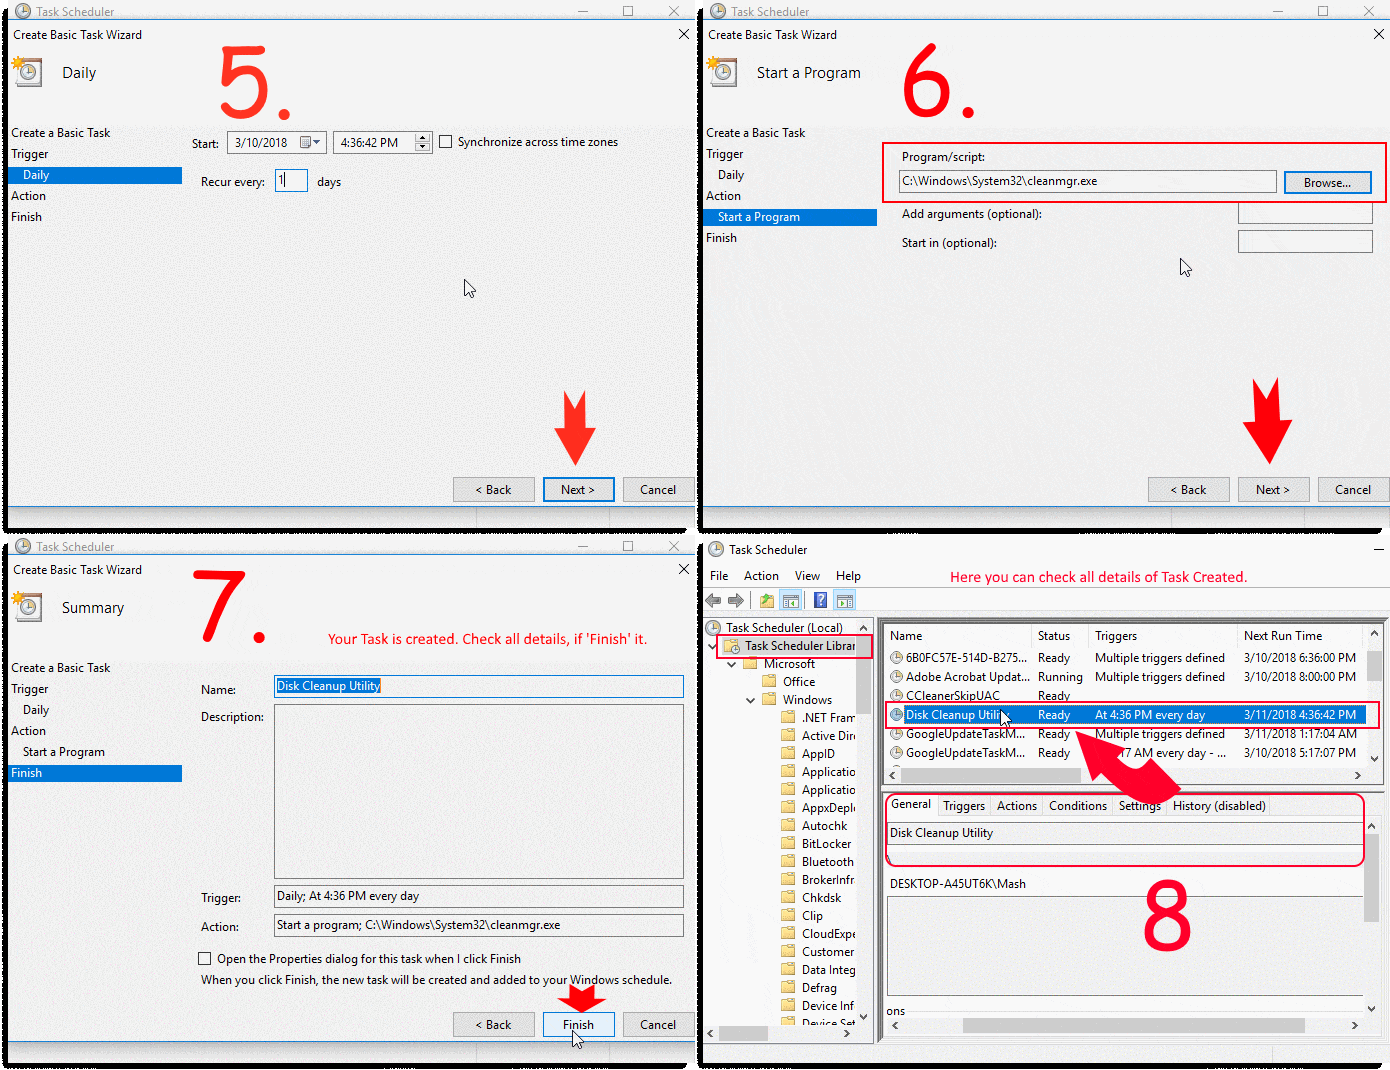
Step 5: In next window, you can select from when you want to start this task and select the further timing options as per your last choice. Once set this, click on next button.
Step 6: In next window, you have to select the ‘Action’, what action do you want the task to perform. Here you will get 3 options, but for windows 8/8.1 or above version, only first option ‘Start a program’ will work. However, in Older Version of Windows OS, all these 3 option gonna work. So, select the only first option and move forward.
Step 7: Now, just browse the path of an executable program or script. For instance, we have selected task for ‘Disk Cleanup’ [another windows program], so we have browsed to the ‘cleanmgr.exe’ in ‘C:\Windows\System32’.
Step 8: In next window, just check all the task details and click on ‘Finish’ button.
Now you can check your created task in ‘Task Scheduler Library’, as shown in Image no. 8 of above GIF Image. If you want to edit any detail of this task, just ‘double-click’ on it –> one window will get opened where you can edit the task details.
Guys, In this fashion you can automate your work using this Windows Task Scheduler. There are many Free Windows Scheduling Software also available with additional functions which can smooth your automation work. If you know any such Free Tool/Software, share with us, we gonna include that one also in our article.
You should also read this awesome trick: Track Any Mobile Number Current Live Location on Map


