We can easily configure our Gmail Account in Microsoft Outlook, in two parts. In First part, we will do required settings in Gmail Account and in the Second part, we will Set Gmail Account into Microsoft Outlook.
Let’s Check out step by step guide How to Configure Gmail Account in Outlook:-
How to Configure Gmail Account in Outlook
#Part 1: Settings In Gmail Account
Step 1. To configure Gmail account in Outlook, we’ll start with modifying the settings in the Gmail account. Open your Gmail account.
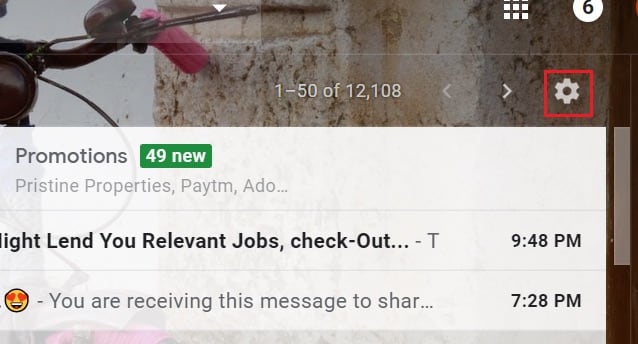
Step 2. Click on the Settings button viz. in the top right.
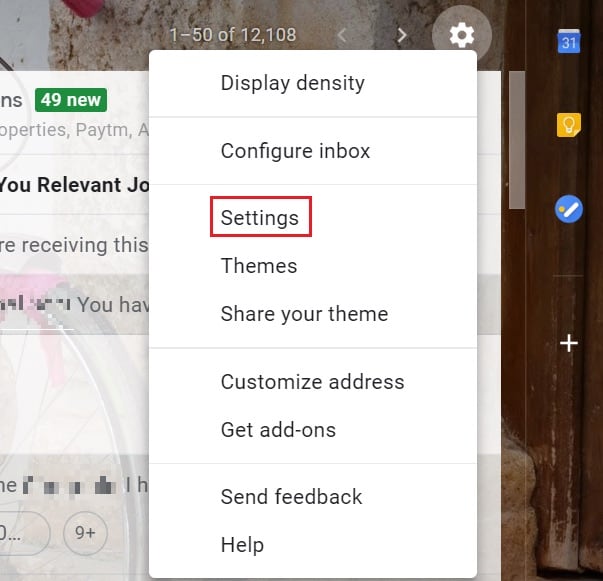
Step 3. Choose ‘Settings’ from the menu that expands.
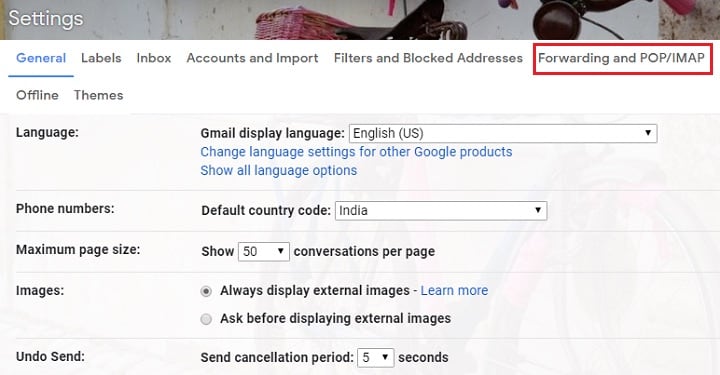
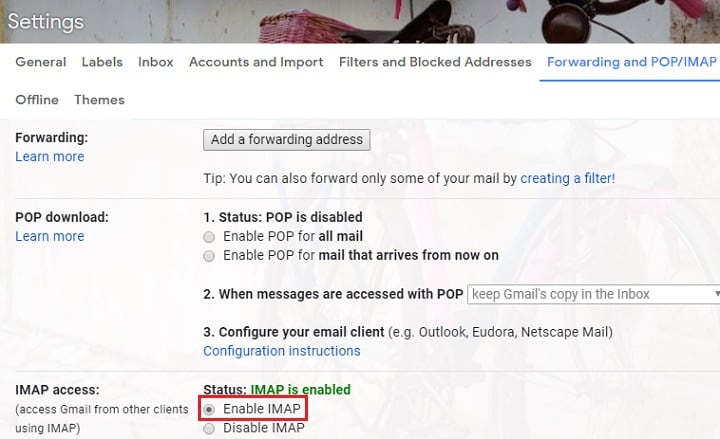
Step 4. From the horizontal tab, click on ‘Forwarding and POP/IMAP’.
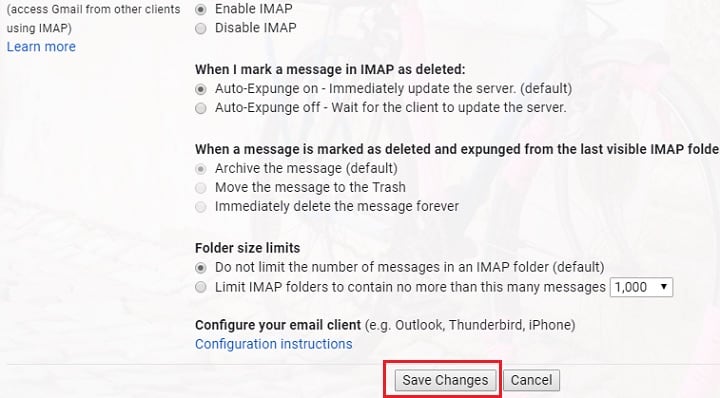
Step 5. In the last section, IMAP access, we need to select ‘Enable IMAP’. If it already set, then you don’t need to do anything here and proceed to the next step.
Step 6. Click on ‘Save changes’.
#Part 2: Configure Gmail Account in Outlook:
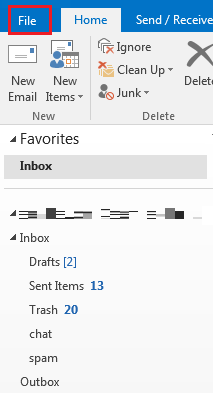
Step 1. Now, open your Outlook account and click on the ‘File’ menu to configure Microsoft Outlook for Gmail.
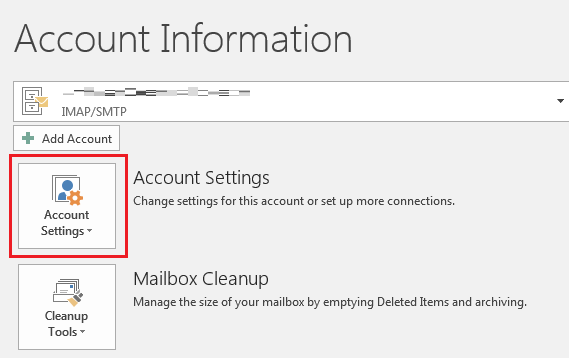
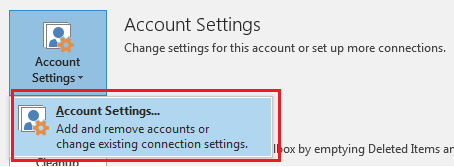
Step 2. From the menu, click on ‘Account Settings’ option.
Step 3. It’ll expand and show another option to choose. Click on ‘Account Settings…’ from the menu.
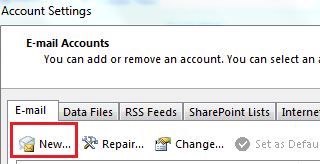
Step 4. A window will appear. Click on ‘New’ button.
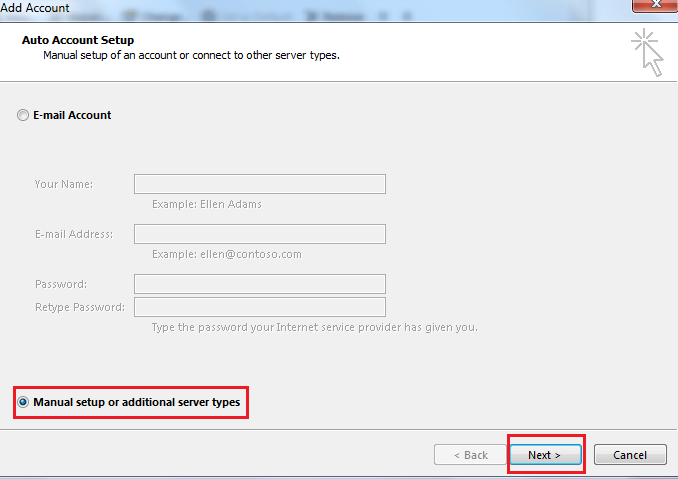
Step 5. From the two radio button, choose the one adjacent to ‘Manual setup or additional server types’ and click ‘Next‘.
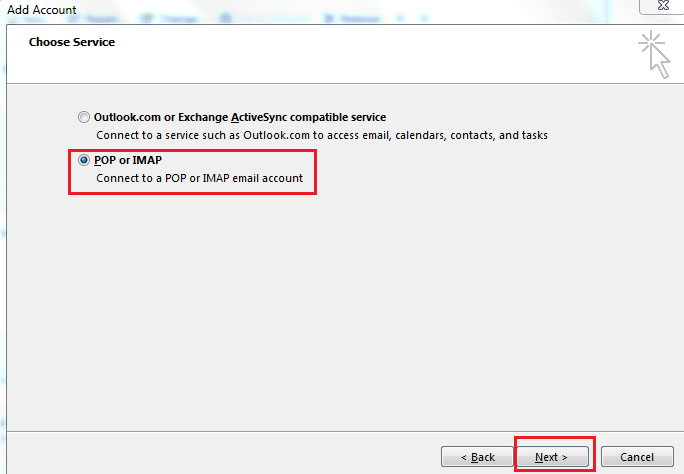
Step 6. You’ll be redirected to the ‘Choose Service‘ window. Choose ‘POP or IMAP’ option and click ‘Next‘.
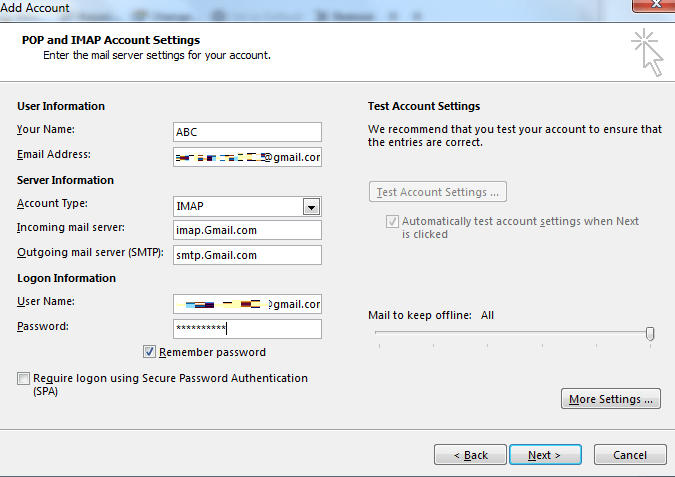
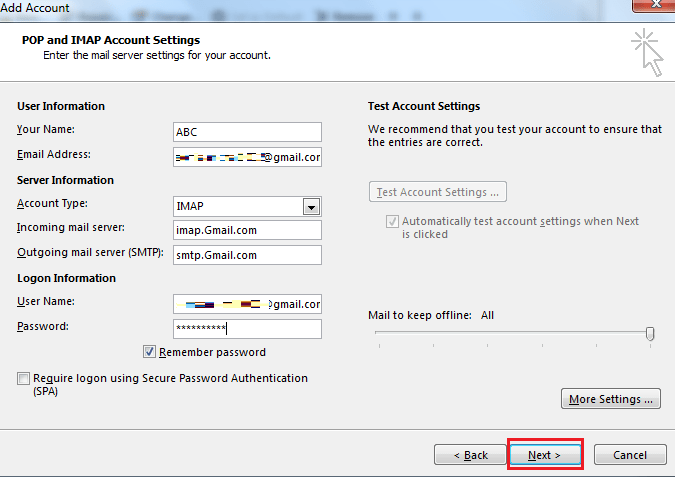
Step 7. To add a Gmail account to Outlook, enter the following details in the new window:
Your name– <Display Name>
Email address– <Gmail Address>
Account type– IMAP
Incoming mail server– imap.Gmail.com
Outgoing mail server (SMTP)- smtp.Gmail.com
User name– <Gmail address>
Password– <Gmail password>
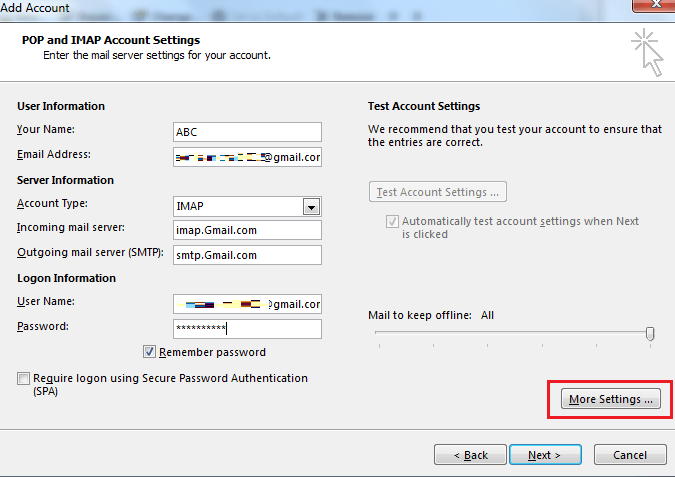
Step 8. Click on ‘More Settings…’.
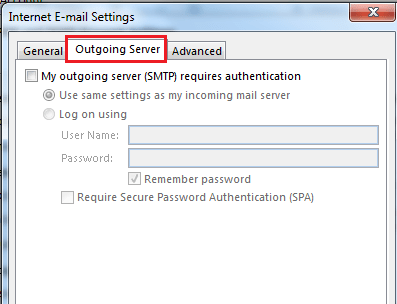
Step 9. Internet E-mail Settings window will open. Out of its three tabs, click on ‘Outgoing Server‘.
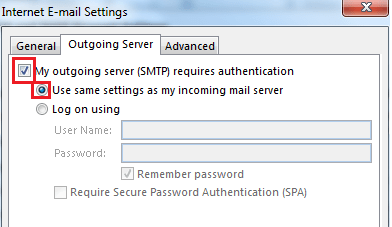
Step 10. Click on the checkbox that says, ‘My outgoing server (SMTP) requires authentication’ and select the radio button that says, ‘Use same settings as my incoming mail server’.
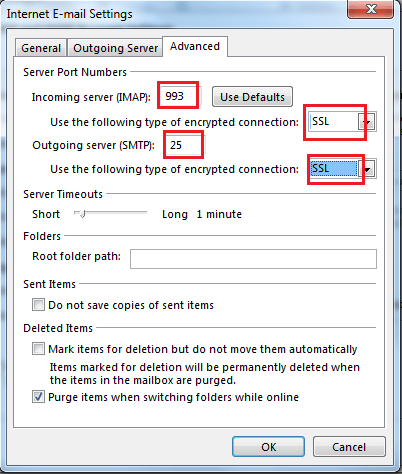
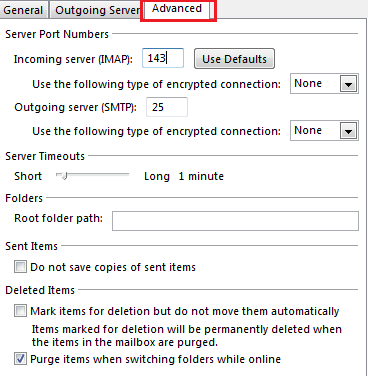
Step 11. Now switch to the ‘Advanced’ tab.
Incoming server (IMAP)- 993
Use the following type of encrypted connection- SSL
Outgoing server (SMTP)- 465
Use the following type of encrypted connection- SSL
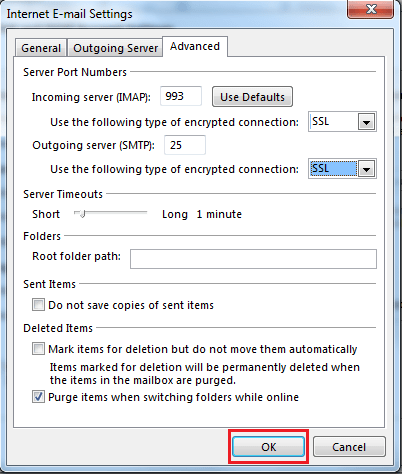
Step 13. Click ‘OK’.
Step 14. You’ll be automatically redirected back to the ‘Add Account‘ window. In this window, click on ‘Next’.
Step 15. Now, Outlook will test the connection. After the test completes successfully, click on ‘Close’ and then ‘Finish’.
If the test fails, you need to check if all details were entered accurately.
