Have you ever think of Scheduling Message on WhatsApp? Yes, if you are wondering about the same, you are at right place. Here, you will get to know How you can Schedule WhatsApp Message In Android Device even if your device is not ROOTED. In our earlier articles, we have explained How To Schedule Email, Set Reminder & Track Email in Gmail.
Do you Know?
- How To Install Android Apps Not Available In Your Country
- How To Send Self Destructive Message On WhatsApp [iPhone/Android]
WhatsApp officially doesn’t provide the facility to Schedule Message but with the help of a wonderful Android App called as: “Scheduler for WhatsApp”, this can be done easily. Let’s Check out the functionality of this awesome app Graphically [GIF Image], Practical [Video Tutorial] & Theoretically.
Scheduler for WhatsApp – Android App
Using Scheduler for WhatsApp Android app, you can easily Schedule WhatsApp Message on Android Device. It’s very simple & easy to use. This app works with a Non-Rooted device but this comes with certain conditions. Yes, Conditions are not so hard:
- Your device must not have any type of lock at the scheduled time.
- Your device must have Active Internet Connection at the scheduled time.
Just follow the step-by-step procedure as given below:
Step 1: First Download & Install: Scheduler for WhatsApp from Google Play Store on your Android device.
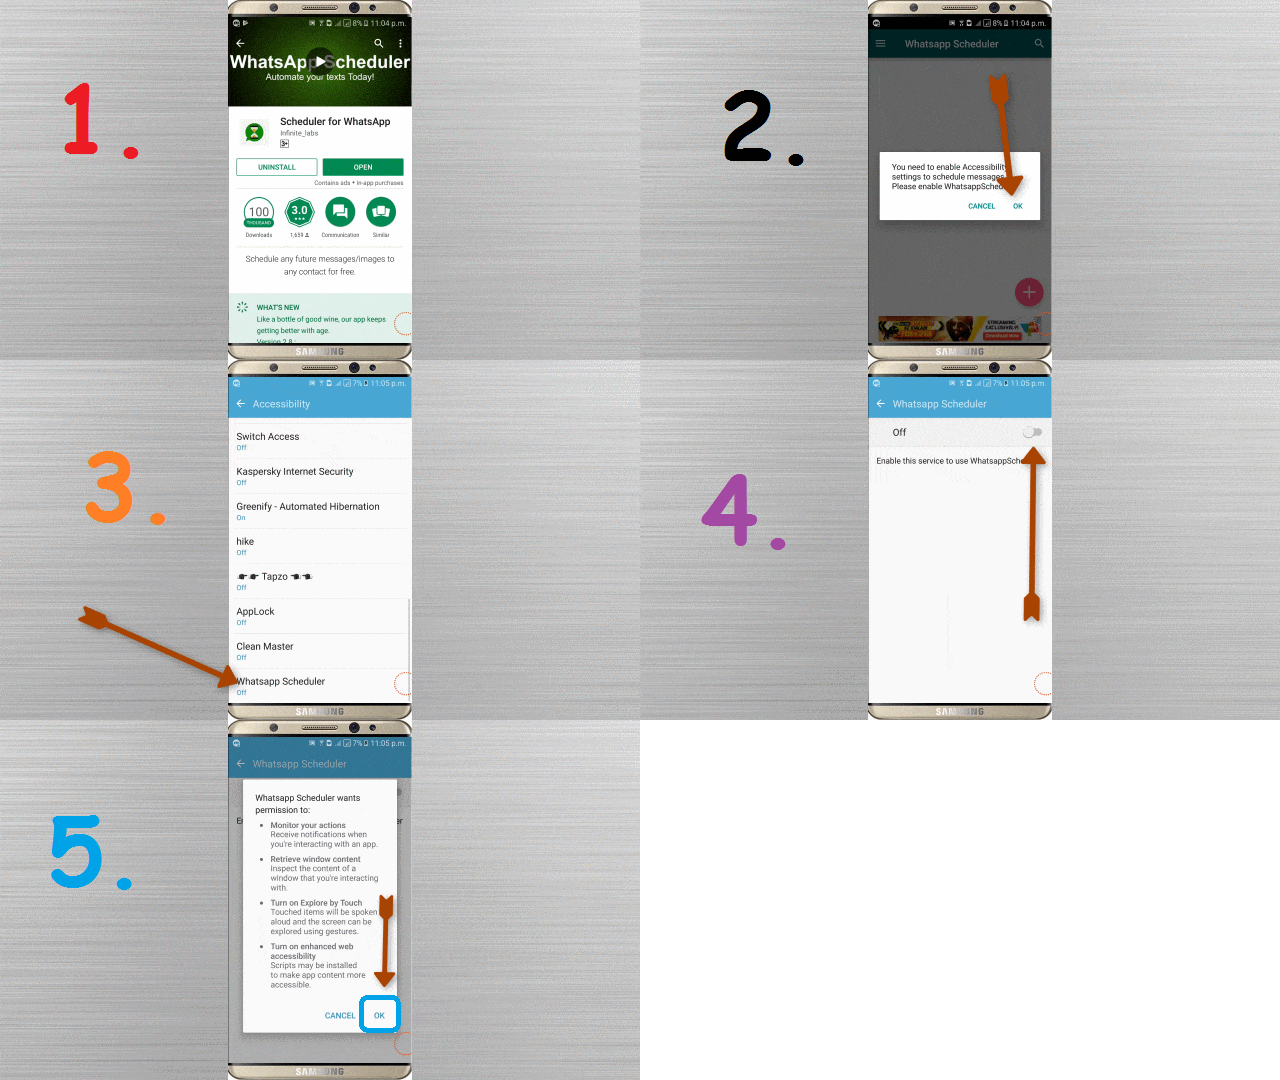
Step 2: First time when you will open this app, it will ask to enable for Accessibility Settings. Just click on ‘OK’ and allow it. Refer below GIF Image.
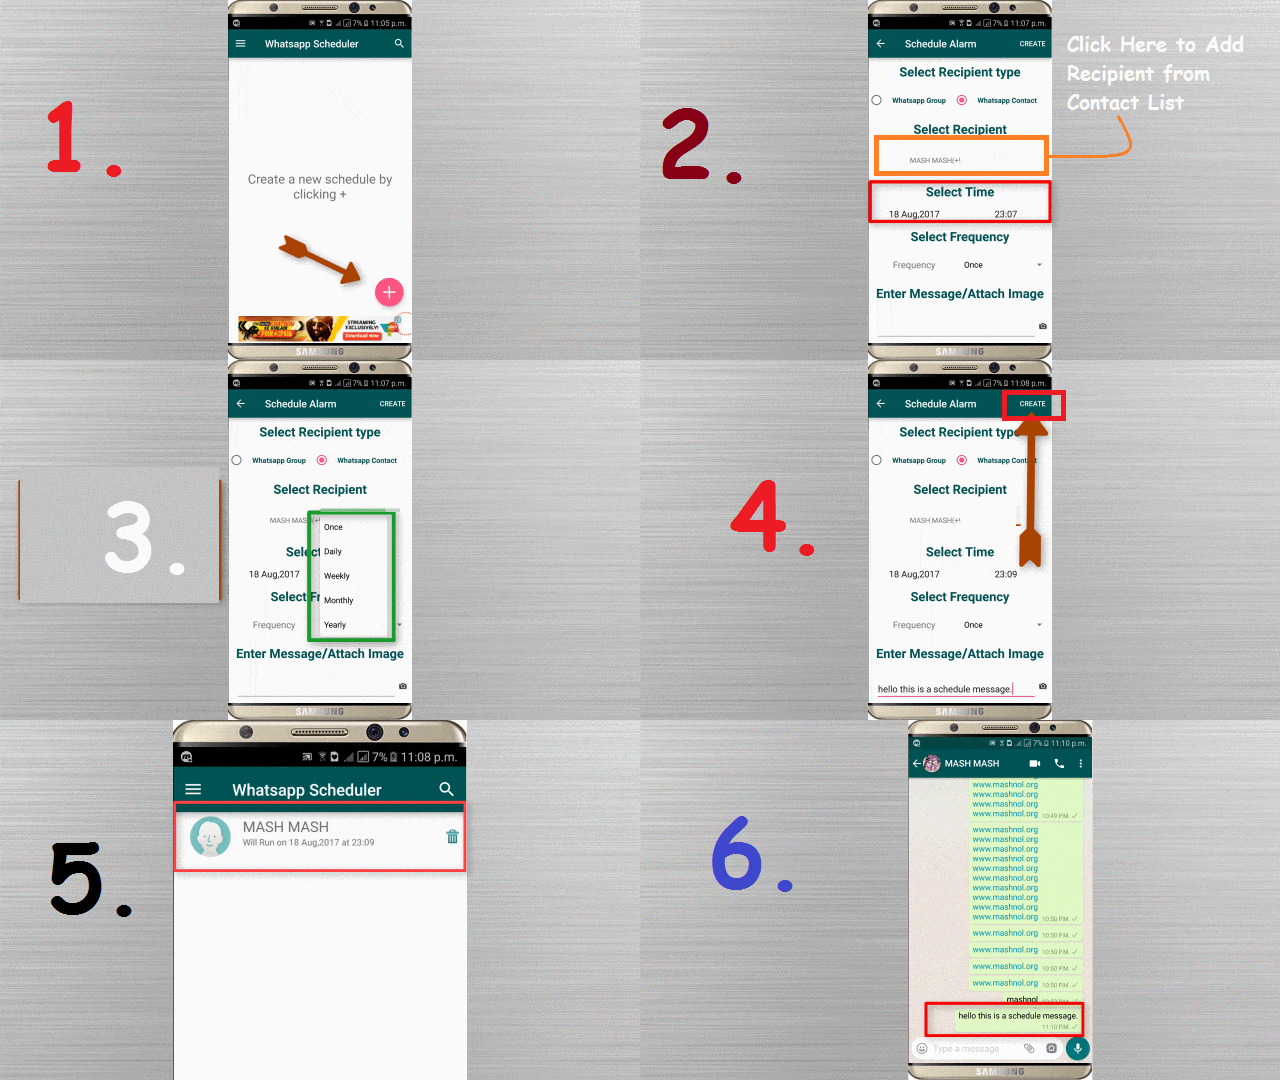
Step 3: On Bottom Right Corner of Welcome Screen, click on (+) icon to create a new message.
Note: On next screen, you will see “WhatsApp Group” and “Attach Image icon on Extreme Bottom Right corner” both these features are paid. If you want to use these features you have to upgrade this app by buying it.
Step 4: Just Select “WhatsApp Contact”–> Click on the field of “Select Recipient”, a contact list of WhatsApp will be displayed and select recipient. Now, Set the desired date and time for scheduling the message. You can also select the frequency of the scheduled message “Once, Daily, Weekly…..”. In Next field, just Type your message and click on “Create” on the Top Right corner.
Step 5: Now you have created Schedule Message. This schedule message will be delivered to the selected recipient at the scheduled time, as shown in Image no. 6 of above GIF Image. That’s Done!!!
Also, Watch Step By Step Live Video Tutorial:
Must Check Out:
How To Bypass OTP Verification Using Virtual Phone Numbers


