Let’s consider the case, “you are going to the outside and some task is running on your Computer” OR “It’s your time to sleep, but you can’t stop the ongoing task/process in your computer”. In such cases, you might require an automatic shutdown timer, which will automatically shutdown your computer after a specific time period.
In this article, we are gonna show you how you can easily set automatic shutdown timer within seconds without using any tool. You can also schedule many tasks using an inbuilt program ‘Windows Task Scheduler’, Read Here complete guide. We can also use this ‘Windows Task Scheduler’ to shutdown our Computer System. Let’s see 3 simple methods of doing it.
Also Read:
Set Automatic Shutdown Timer in Windows 10/8/7
To set automatic shutdown timer, you don’t require to download any extra software/tool. This can easily be done from Run Command Window, Command prompt and also by using Windows Task Scheduler. Steps are pretty simple and straightforward, anyone non-technical person can also do it. Just follow the step by step guide as given below for 3 methods:
Method 1: Using Run Command Window
In method 1 and method 2, we gonna use a simple command to shutdown our system after a specific period of time.
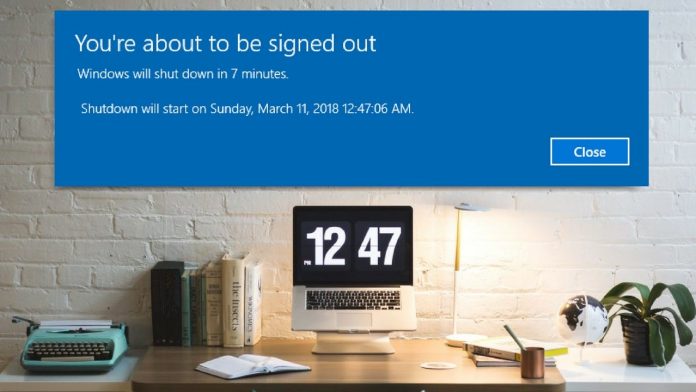
Just open Run Command Window by pressing ‘Windows key+r’ and type ‘shutdown -s -t 3600’ and press ‘Enter’. Here ‘3600’ is the time in ‘seconds’. A message will pop up that Windows will automatic shutdown after the set specific time.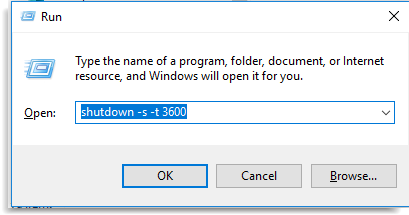
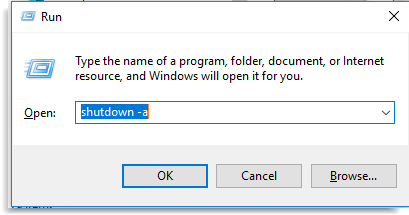
Cancel the Set Timer:
To cancel the set timer, again open ‘run command window‘ and type command: ‘shutdown -a‘. You will get instantly a message that your scheduled shutdown has been cancelled.
Do you Know? How To Connect To Locked WiFi Without Password [HACK]
Method 2: Using Command Prompt:
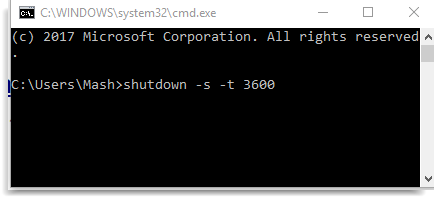
Similar to the method 1, explained above, we also gonna use the same command in ‘Command prompt‘.
To open command-prompt, Go to Start Menu and search for ‘Command Prompt’ OR directly open run window and type ‘CMD.’ Now type the same command: ‘shutdown -s -t 3600’ and press enter.
A message will also pop up that Windows will automatic shutdown after the set specific time, as shown above.
Cancel the Set Timer
To cancel the set timer, again open ‘command prompt‘ and type command: ‘shutdown -a‘ and press enter. You will get instantly a message that your scheduled shutdown has been cancelled, as shown above.
Related Article: Schedule Email, Set Reminder & Track Email Using Boomerang For Gmail
Method 3: Schedule Automatic Shutdown Using ‘Windows Task Scheduler’
Windows Task Scheduler allows you to schedule and automates your work. We can also use Task Scheduler to set automatic shutdown timer. Read here complete article to know how you can create a new task and schedule to automate your work.
To create shutdown timer, follow the simple steps given below:
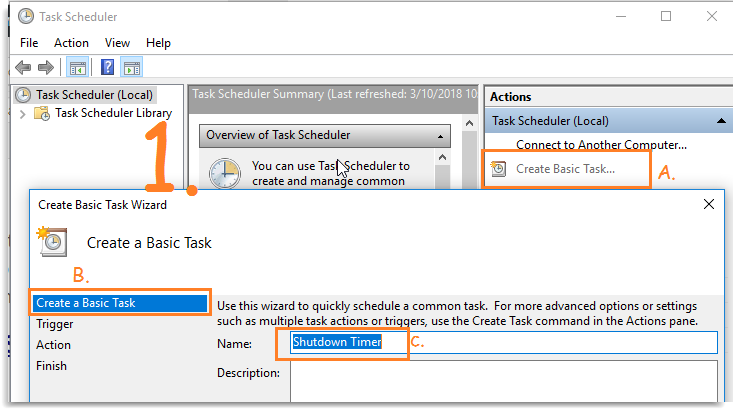
Step 1: Go to start menu and search for ‘Task Scheduler’ and open it.
Step 2: Now click on ‘Create Basic Task’ link available in the rightmost column. A New window will open, just give a name to this task & click on Next. For instance, we have given it a name: ‘Shutdown timer’
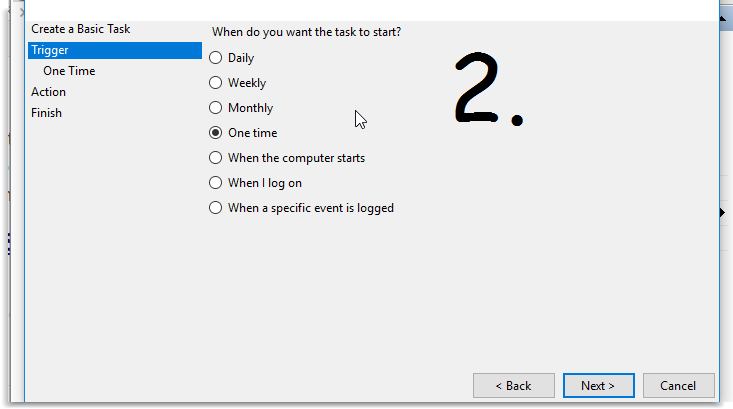
Step 3: In next window, select when you want to schedule the task and move further.
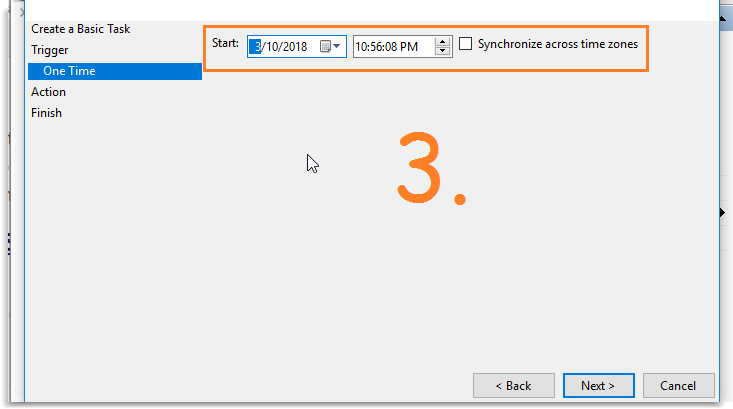
Step 4: Now, you can set the exact time, when you want your system to shutdown. Set the exact time and click on next.
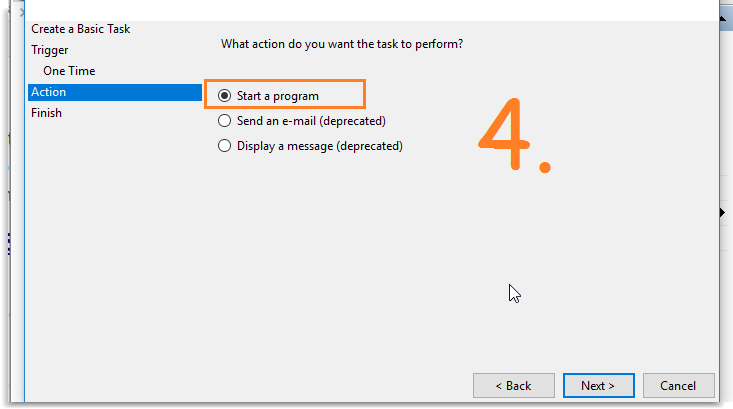
Step 5: In Action tab, select ‘Start a program’ option –> click on ‘Next’.
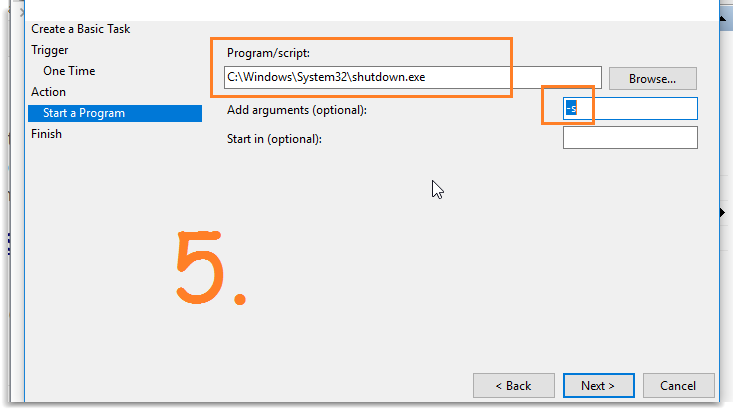
Step 6: Now we are gonna browse to a program ‘shutdown.exe’ in our windows and don’t forget to add ‘-s’ in argument field. Just click on next and finish it.
Now you have successfully created a scheduler to shutdown your computer at a specific time. If you want to disable this, then refer to our complete guide on ‘Windows Task Scheduler’.
These 3 Methods of creating an automatic Shutdown Timer in Windows OS will definitely gonna help you. Enjoy 🙂 you would also like to know this awesome trick:
Create WhatsApp Group Invite Link to Join without Admin Permission
